How To Add A Custom Domain For Your Fundraising Organization In Crowdfundly?
With Crowdfundly you can easily add a custom domain and verify your fundraising organization easily. By doing this, you will gain credibility and collect contributions quickly.
Follow this easy step-by-step guide to add a custom domain in your fundraising website.
Step 1: In order to begin the process, you will need to log in to your hosting account.
Step 2: Now search for ‘DNS/ DNS Zone Editor’, when you get there you will see your domain listed on that page.
Step 3: Select the domain you wish to add to the CNAME record from the list of your domains. To add the domain, click on the Add ‘CNAME Record’ button.
Step 4: You will then be taken to the ‘Add CNAME’ option, where two fields will appear.
*In the name field you need to add your Domain/Subdomain name from where you will be able to access or browse the Application/Public page/ Company page.
*In the CNAME field you must put the custom.crowdfundly dedicatedly in the process.
Now, you need to press the ‘Add Cname’ button. Wait for a while until your CNAME record is publicly discoverable.
Example for DigitalOcean:

Example for Namecheap:

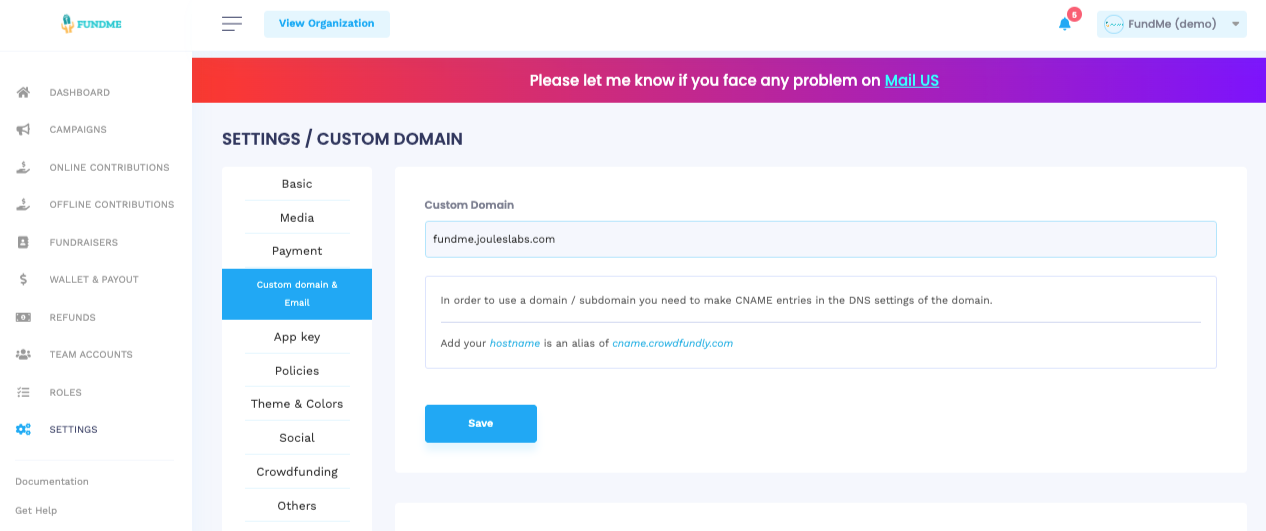
Step 5: After getting the custom domain name from the previous step, add the same name under the Settings → Custom Domain & Email of Crowdfundly App and click the ‘Save’ button.
Once it’s been verified successfully, your data will be saved and your company page will be served on a custom domain. If not, your domain name will not be saved and you will receive an error message.

This is how easily you can set up a custom domain in Crowdfundly by following this step-by-step guideline.
Having difficulties? Feel free to reach out to our dedicated support team, also if you want, you can join our Facebook community to get all updates about Crowdfundly.


